Monday, December 10, 2012

Chunky Red Chili


This whole weekend had been dark, rainy, and dreary. I’ll I want to do is snuggle up on the couch with a piping hot bowl of chili. The twins keep me running, so snuggling up on the couch may be out, but I can make a big pot of chili, and let it cook while I chase after my little ones. Chili has a way of warming up not only your body, but your soul as well. And chili freezes so well and you can make a big batch and freeze individual portions so eat on a rainy day to warm up your day.

I know traditional chili has no beans, or what some people call filler ingredients. If you are one of those chili purest, then don’t think of this recipe as a chili, think of it as a chili inspired soup. This is thick, chunky, and packed full of flavor in every spoonful. You can make it as spicy or mild as you like. This is a spicier chili, so if you don’t like it that spicy leave out the jalapeno and cut back the cayenne pepper.

Chunky Red Chili
1 Tbsp. vegetable oil
1 lb. ground beef
2 onions, chopped
3 cloves garlic, minced
2 (14 oz.) cans petite dices tomatoes, undrained
2 cubinal pepper seeded and diced
2 carrots peeled and diced
1 (8 oz.) can tomato paste
1 Tbsp. chili powder
3 tsp. ground cumin
1 tsp. garlic powder
1/2 tsp. salt
1/2 tsp. pepper
1 tsp. cayenne pepper
1 bottle hard apple cider
2 (15 oz.) cans red kidney beans, rinsed and drained
1 (15 oz.) can black beans, rinsed and drained
4 cups chicken broth

In a large heavy bottomed pot heat the vegetable oil. Cook the onions until translucent. Add in the garlic, carrots, and peppers. Add in the ground beef and cook until the meat is browned.  Add in the tomato paste, chili powder, cumin, garlic, salt, pepper, cayenne pepper, and cook for 1 minute. Add in the Apple cider and scrap all the brown bits up from the bottom of the pot. Then add in the beans, jalapeno, and chicken broth. Bring to a boil, then reduce heat, cover and simmer for 50-60 minutes.

To freeze, Cool completely, then place in plastic freezer safe containers and freeze until solid.

To reheat, place chili in saucepan with 1/4 cup water and cook over medium heat, stirring occasionally, until reheated. At this point if you wan thicker chili you can add 1 Tbsp. cornstarch and cold 1/4 water mixture and stir well. Or you can reheat in the microwave, heaint in 1 minute intervals and stiring in between to help cook evenly. will take between 3 and 5 minutes.


Monday, December 3, 2012

The Wonderful World of Parsnips

Parsnips are a largely under utilized vegetable  it looks like a rounder white carrot, but the flavor is very different. Most people walk right past them in the store or only pick them up to put in their soup. I was the same way, until one day i decided to experiment with mixing mashed potatoes with some mashed parsnip to get some more vegetables into my husbands diet. They were awesome, and he never even knew.

When the parsnips are roasted they develop this rich nutty flavor and become velvety smooth when pureed, add a bit of butter and serve as a instead of mashed potatoes. You can steam you parsnips if you prefer and use the cooking liquid to thin out the mash. Best part is you can make a big batch now while the parsnips are at their peak and pull them out and serve any night of the week.

.

Basic Mashed Parsnips

Peel parsnips, remove the ends, then cut them lengthwise, in half. Lay parsnips on a piece of foil and drizzle olive oil over them. Sprinkle with salt and pepper. Close up the foil into a pouch and then bake in a 400 degree oven for approx. 30 minutes or until fork tender. Put in the food processor, add in 2 tbsp of butter and puree until you get the consistency you like. Serve or freeze in freezer safe container for up to 8 months, some people say 10 months, but i don't recommend past 8 months.

Variations:
Roasted Leek and Garlic Parsnip Puree: 3 large parsnips, 1 leek sliced, 2 garlic cloves peeled-  Roast all the vegtables as above, add in 1/2 cup milk or heavy cream.
Sour Cream and Chive Mashed Parsnip: Cook as directed above, add in 1/2 cup of sour cream, and 1 tbsp chopped chives, add in 3 tbsp butter and puree as above.
Parsnips, Carrot and Apple Mash: 4 parsnips, 4 carrots, 2 apples all peeled and sliced. Steam together until they are fork tender. put in the food processor, add in 1/2 tsp cinnamon, and puree together. (*this also  great for baby food)


Wednesday, November 28, 2012

Spinach and Walnut Pesto Crustini


Thanksgiving is over and now begins the season of cocktail parties, family gatherings and wine and cheese parties. I used to buy the boxes of pre-made appetizers because they are so easy to make, but then I realized what a rip off they really are. I could make such better tasting appetizers for 1/3 of the price. I make a little at a time, store them in the freezer and then pull it out the day of the party and heat. This way I don't have to spend the whole day cooking. 

Crostinis are an awesome appetizers. You can make the topping ahead of time, freeze it and then the morning of, thaw it out, and place on the toast. You can either make Bruschettini or buy it and just put it on a tray and serve. This crostini takes 5 minutes to make, literally. You throw everything in a food processor and then either serve or freeze.

This Pesto is made with baby spinach, but I have made it with frozen spinach in the past and it comes out fine. The key is if you’re going to use frozen spinach is that you defrost it and squeeze out the excess water, otherwise your pesto will come too watery. 
  
Spinach and Walnut Pesto Crostini
2 c packed baby spinach
1/2 c toasted walnuts
1/3 c Asiago cheese
1 clove of garlic
1/4 c olive oil

Put the spinach, walnuts, cheese, and garlic in the food processor. Pulse 3 times, then scrape down the sides, add about half the olive oil. Turn the food processor on and drizzle in the rest of the olive oil until a paste forms. I like mine slightly chunky, not so smooth, but blend until you get the consistency you want. Serve or freeze. Will last in the freezer for 4-6 months.

Monday, November 19, 2012

Freezing Thanksgiving Leftovers

If your family is anything like mine, there is always way more food than anyone could possibly eat in one meal. Remnants of stuffing, sweet potatoes,  turkey, and more remain for days in the refrigerator and ultimately end up getting thrown out. There's only so many things you can do with leftovers right?

Well, freezing your leftovers is a great option to waste less food, and gives you a longer period of time to re-invent them. Not all leftovers will freeze well, but many of them will. The key is to freeze things properly and in proper portion sizes. Since this food has already been served and then frozen, you don't want to have to heat a large amount and end up with leftovers that you have to throw out anyway.

Here is a list of what freezes well and helpful tips on how to store them properly.

Turkey- First thing you need to do is break it down. I don't like to freeze the meat on the bone, so I pull as much meat off the bone and set aside for stock for later. I break it down in a few different ways so that i can use it in a few different preparations  So i'll shred some of it and store in 1 cup portions so i can use it in soups or enchiladas. Then I'll roughly chop some into cubes for chilies, casseroles, and breakfast hash. Finally I'll slice some to serve as a turkey dinner for a quick go to meal any night of the week. Make sure that  you freeze the turkey in an air tight container, and not too much bigger than the amount of meat the you freeze. If i'm using a Ziploc bag i wrap it in aluminum foil and then place in the Ziploc, squeeze the air out and freeze. Basically the more air that circulates around the meat means that it's more likely to get freezer burn and dry out. portioned out the turkey should last in your freezer for 3 months.

Ham- Not your traditional Thanksgiving meal, but I know some families prefer ham to turkey. Ham freezes very well. You basically use the same break down and freezing steps as you would for the turkey. It is good to use later for soups, gumbos, ham croquettes, or even to through in your mac and cheese.  Portion it out and freeze.

Stuffing- Stuffing is tricky. It does freeze well in 90% of cases. However, if you made a dry stuffing it won't last long in the freezer. The stuffing needs to have some moisture to sustain itself in the freezer. The stuffing should also be portioned into single serve portions in an air tight container. You can use Ziplock bags but be sure to squeeze all the air out. Stuffing will last in the freezer for about a month, but not much longer than that so be sure to date it.

Sweet Potato Casserole- This freezes pretty well. I typically don't serve it again as mashed sweet potatoes again. I'll thaw it and make sweet potato pancakes or use it in a turkey hash. if you do plan on serving as is, it may be a little watery, but still very edible. This can last in an air tight container for 3 months.  Regular mashed potatoes do not freeze well. They become grainy and watery no matter what you do with them.

Cranberry Sauce: Cranberry sauce can be frozen using the ice cube tray method, or you can throw it in a blender make it smooth and freeze so you have a cranberry sorbet. It's awesome. Either way you freeze it will stay good in the freezer for 3 month.

Gravy: Ice cube tray method is definitely the way to go. You can pull out a cube or two when ever your ready to serve. If your gravy it too oily, it may remain somewhat soft when you freeze it. This is ok,  it's still safe. Gravy stays good frozen for 3 months.

Soup: As long as it is not a cream based soup, like a clam chowder or cream of potato, it should freeze fine. Cream based soups separate and I don't have much luck freezing them. But other soups freeze beautifully. Pumpkin soup, chicken soup, leek soup and so on are perfect candidates for freezing. Turkey stock also freezes well and portion it out so you can grab it quickly for lunch during the week. Most soups last for about 3-4 months.

Vegetables: This depends upon their preparation  I find roasted vegetables do not freeze well at all. Blanched vegetables freeze beautifully. Mashed vegetables freeze pretty well, but they can become a little bit watery. If you're using a Ziploc bag, be sure to squeeze as much air as you can out because thy will get freezer burn. You can also pack them in an airtight container; they won't expand so you don't need to leave that much space at the top. Something like a green bean casserole or honey glazed carrots will freeze well.  They may be a bit softer when you reheat them, but they will taste good.

Pies and Desserts: I often freeze pies, cakes and cookies. the key proper packaging and proper defrosting. You have to slice it into individual pieces, wrap them in aluminum foil, and place in a Ziploc bag. Squeeze out the air and freeze. When you are defrosting. be sure to remove from the bag, and unwrap and place on a cooling rack to defrost. If you don't do this, as it thaws, the water will pool in the aluminum foil and make the dessert soggy. If you do this your desserts can freeze for 3 months. Any cakes with frosting on them do not freeze well, refrigerate them and use with in a week.

Hope this helps to safe you Thanksgiving leftovers. you worked way too hard to prepare a beautiful meal to see it thrown in the garbage. Upcylce your foods by turning them into new dishes.

Sunday, November 18, 2012

Butternut Squash Bisque

Soup is a staple at family gathering and it is so easy to make ahead of time and freeze for when you need it. Now is the perfect time of year for squash of all varieties  Stock up now and enjoy for the entire winter season. This soup can be made with acorn squash or pumpkin instead. Which ever looks the best when you do your shopping. Its so easy and freezes so well. The perfect addition to any thanksgiving feast. You can either freeze this soup ahead of time, or freeze the leftovers and enjoy later.

Typically I say don't freeze anything that has cream in it because it has a tendency to separate when you reheat it. However this is not a cream soup; its a soup that happens to have a little bit of cream in it. I have not had a problem with this soup separating on me. I either heat a small portion in the microwave for myself, or if I'm heating a big batch, heat it slowly in a sauce pan with a 1/4 cup warm chicken stock or water, whisk occasionally and it shouldn't separate on you.

Butternut Squash Bisque
3 tbsp olive oil
1 leek thinly sliced,  white and light green section
2 garlic cloves roughly chopped
1/2 tsp dried thyme
1/4 tsp ground cinnamon
1/2 tsp freshly grated nutmeg
1/4 tsp cayenne pepper optional
1 tsp salt
1 tsp black pepper
1 large butternut squash  peeled, seeded, and cut into 1-inch cubes
4 cups chicken stock
1 cup half-and-half
1 tablespoon fresh lemon juice and zest

Heat oil in a large stock pot over medium heat. Add in the leeks and garlic until onion is softened, 5 to 7 minutes. Stir in the thyme, cinnamon, nutmeg, salt, pepper, and cayenne, cook for 1 minute. Whisk in the chicken stock and half and half. Once combined, add in the squash. Bring to a boil. When its boiling, cover with a lid, reduce to a simmer, and cook until squash is tender, about 20 minutes.Working in batches, puree in a blender until smooth. Stir in lemon juice and zest. Taste and adjust seasoning with salt and pepper. When you are about to serve add a dollop of sour cream and a few chives or toasted pumpkin seeds.

To Freeze: Portion the soup out either into single servings or serve into a batch for your family gathering. Be sure to leave a 1/2 in space because this soup will expand and pop the lid off. 

Saturday, November 17, 2012

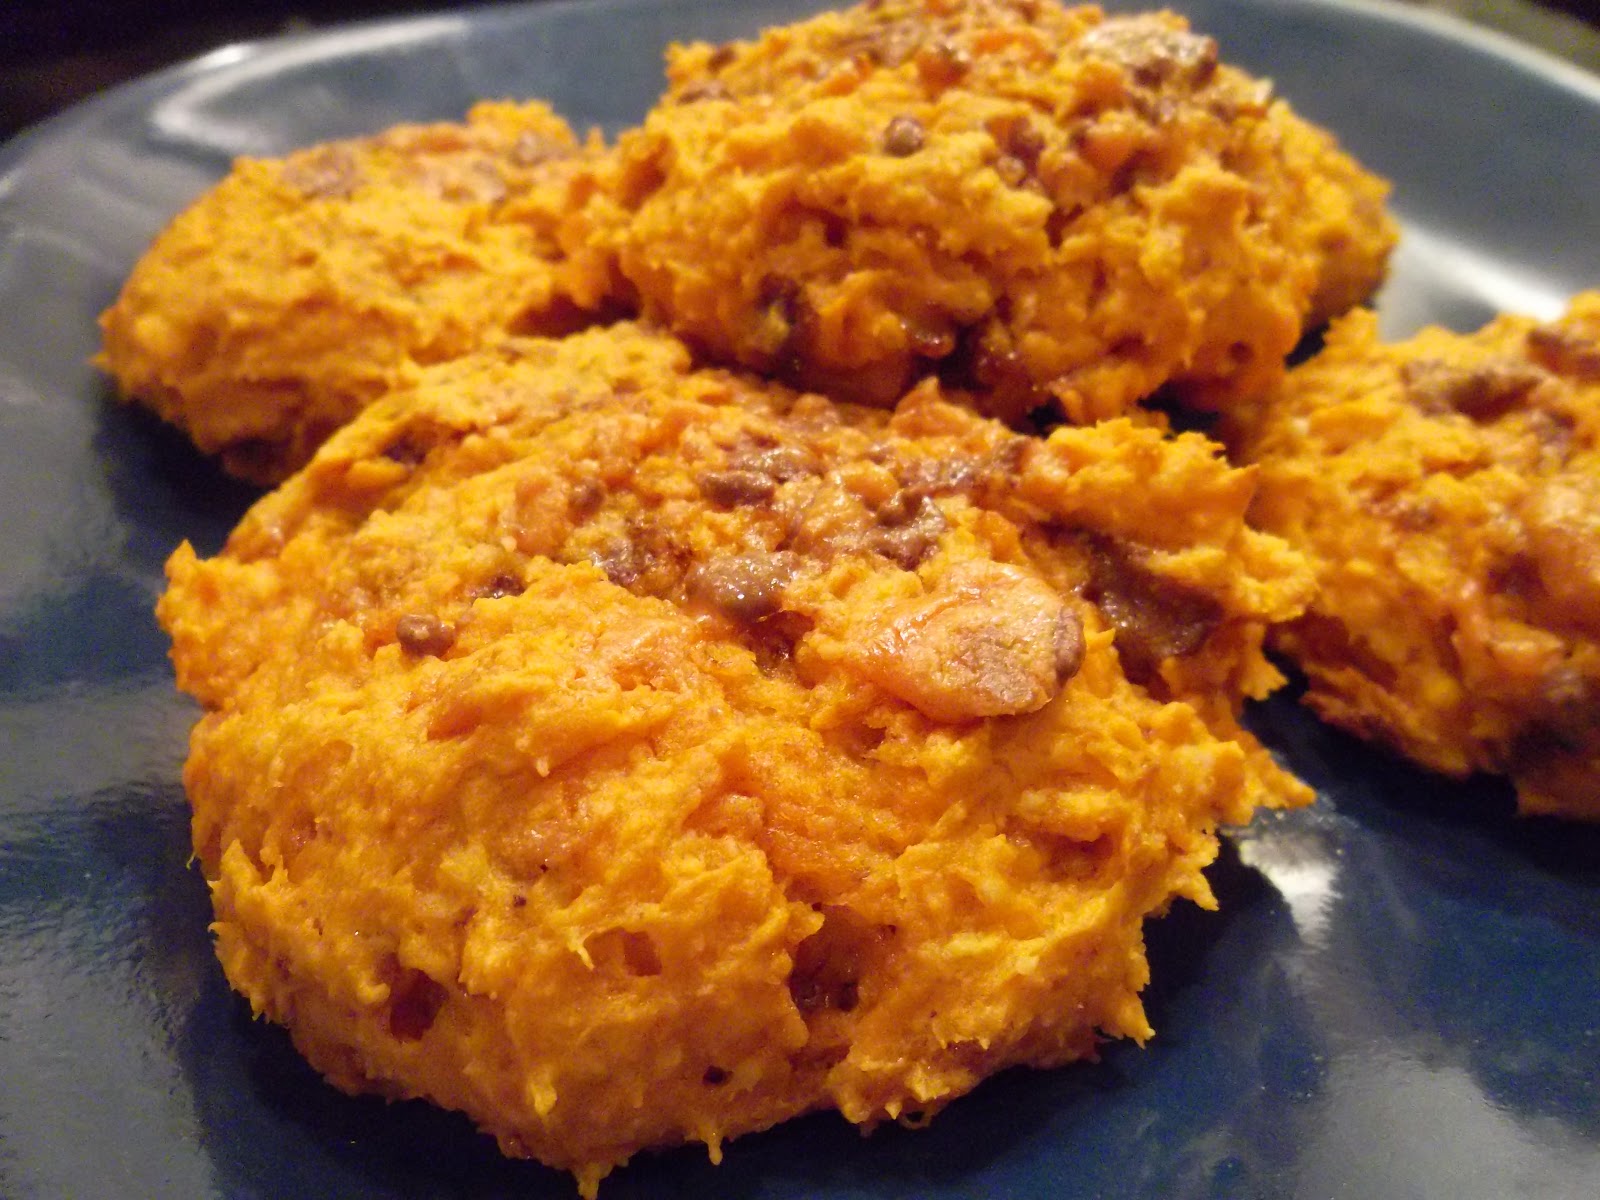
3 ingredient Pumpkin Butterfingers Cookies

What is this about? I know they sound crazy, but they are awesome. First off, i'm still trying to get rid of all of this Halloween candy and trying to come up with some creative ways to use it so I stop eating it. Secondly, pastries and desserts in general freeze pretty well . They are a great make ahead for any occasion and especially when your oven is going to be tied up most of the day with a big ol' turkey.

This is the easiest cookie you can make. It is 3 ingredients and there are no eggs in it. There are so many people with allergies now that you have to try and accommodate their needs, with good food that everyone would like. With that being said i made these with butterfingers, but if you have someone that is allergic to nuts, you could totally use Heathbars or whoppers instead. you want something that has a crunch to it. Sometimes when i'm feeling crazy, I'll melt some chocolate in the microwave and half dip them in it for some extra chocolate-iness.

These cookies are so easy to make you'll find any excuse to make them, but they are perfect at the Thanksgiving table and freeze beautifully. Enjoy.

3 Ingredient Pumpkin Butterfingers Cookies

1 box Golden Cake Mix
1 small can pumpkin puree
8-10 fun size Butterfingers chopped up into chunks


Preheat the oven to 350 degrees. Mix together the cake mix, pumpkin puree, and butterfingers chunks until your dough forms. Spoon the dough onto a cookie sheet and place in the oven for 10 minutes, or until the bottoms turn golden brown. Allow to cool.

To freeze:  Place in a freezer safe contain, will last up to 3 months. Defrost on a baking rack before serving.

Thursday, November 15, 2012

Chocolate Chip Cookie Dough Truffles


A friend of mine told me about these vegan cookie dough truffles. I looked up the recipe from Chef Chloe, a vegan blogger and they looked fabulous. But I’m far from vegan so I made these with regular chocolate chips, butter and rice flour. Why rice flour? I found it added a nutty, earthy flavor that I didn’t get with all-purpose flour. Plus this is now a gluten free recipe.

This is perfect dessert for any get together and especially for holiday dinners. There no cooking involved and you can serve them right from the freezer. One of the great things about this recipe is because its egg free, you can eat all the dough you want without feeling guilty.  Be honest how many times have you made a batch of cookie dough and only half of the dough ever made it to the oven. Yeah I know we've all done it. If you've done that then this recipe is perfect for you. 

Here is the link to the original recipe, and below is my version. Once you’ve had one, you won’t be able to stop popping them. http://chefchloe.com/sweets/vegan-cookie-dough-truffles.html

Chocolate Chip Cookie Dough Truffles 
½ c room temp unsalted butter
¾ c packed light brown sugar
¼ tsp. salt
2 tbsp. pure vanilla extract
2 tbsp. water
1 ¼ c rice flour
1 c chopped walnuts (optional)
1/3 c semisweet mini chocolate chips
12 oz. semisweet chocolate 

In your stand mixer, combine the butter, brown sugar, salt, vanilla, and water until combined.  Slowly add flour a 1/3 at a time to prevent it from going everywhere. Mix until incorporated. Remove bowl from the mixer and fold in the mini chocolate chips. Cover dough and refrigerate for 1 hour**.

Get 2 cookie sheets and line them with parchment paper. Take a small spoonful of chilled dough and roll into 1-inch balls with the palms of your hands. Place the balls onto the baking sheets. Freeze for 15 minutes.

Place the remaining 12 oz. chocolate in a microwave safe bowl. Microwave on high for approximately 2 minutes, stirring every 20 seconds.  Let the chocolate cool to room temperature. Remove one tray of cookie dough balls from the freezer. Dip each ball into the melted chocolate and remove using two forks. Place the coated balls back onto the baking sheet and transfer to the refrigerator. Repeat with the second tray of cookie dough balls. Chill until the chocolate is set, about 20 minutes. Either store in refrigerator until serving or gather and place in a freezer safe container. Place in the freezer and keep for a dessert any night of the week.

**A fun alternative for this recipe is put it on a stick like a cake pop. If you do this, place the stick in the ball before refrigerating and then follow the rest of the recipe. You won’t need the forks when dipping in the chocolate because you will have the stick to work with.