Monday, December 10, 2012

Chunky Red Chili


This whole weekend had been dark, rainy, and dreary. I’ll I want to do is snuggle up on the couch with a piping hot bowl of chili. The twins keep me running, so snuggling up on the couch may be out, but I can make a big pot of chili, and let it cook while I chase after my little ones. Chili has a way of warming up not only your body, but your soul as well. And chili freezes so well and you can make a big batch and freeze individual portions so eat on a rainy day to warm up your day.

I know traditional chili has no beans, or what some people call filler ingredients. If you are one of those chili purest, then don’t think of this recipe as a chili, think of it as a chili inspired soup. This is thick, chunky, and packed full of flavor in every spoonful. You can make it as spicy or mild as you like. This is a spicier chili, so if you don’t like it that spicy leave out the jalapeno and cut back the cayenne pepper.

Chunky Red Chili
1 Tbsp. vegetable oil
1 lb. ground beef
2 onions, chopped
3 cloves garlic, minced
2 (14 oz.) cans petite dices tomatoes, undrained
2 cubinal pepper seeded and diced
2 carrots peeled and diced
1 (8 oz.) can tomato paste
1 Tbsp. chili powder
3 tsp. ground cumin
1 tsp. garlic powder
1/2 tsp. salt
1/2 tsp. pepper
1 tsp. cayenne pepper
1 bottle hard apple cider
2 (15 oz.) cans red kidney beans, rinsed and drained
1 (15 oz.) can black beans, rinsed and drained
4 cups chicken broth

In a large heavy bottomed pot heat the vegetable oil. Cook the onions until translucent. Add in the garlic, carrots, and peppers. Add in the ground beef and cook until the meat is browned.  Add in the tomato paste, chili powder, cumin, garlic, salt, pepper, cayenne pepper, and cook for 1 minute. Add in the Apple cider and scrap all the brown bits up from the bottom of the pot. Then add in the beans, jalapeno, and chicken broth. Bring to a boil, then reduce heat, cover and simmer for 50-60 minutes.

To freeze, Cool completely, then place in plastic freezer safe containers and freeze until solid.

To reheat, place chili in saucepan with 1/4 cup water and cook over medium heat, stirring occasionally, until reheated. At this point if you wan thicker chili you can add 1 Tbsp. cornstarch and cold 1/4 water mixture and stir well. Or you can reheat in the microwave, heaint in 1 minute intervals and stiring in between to help cook evenly. will take between 3 and 5 minutes.


Monday, December 3, 2012

The Wonderful World of Parsnips

Parsnips are a largely under utilized vegetable  it looks like a rounder white carrot, but the flavor is very different. Most people walk right past them in the store or only pick them up to put in their soup. I was the same way, until one day i decided to experiment with mixing mashed potatoes with some mashed parsnip to get some more vegetables into my husbands diet. They were awesome, and he never even knew.

When the parsnips are roasted they develop this rich nutty flavor and become velvety smooth when pureed, add a bit of butter and serve as a instead of mashed potatoes. You can steam you parsnips if you prefer and use the cooking liquid to thin out the mash. Best part is you can make a big batch now while the parsnips are at their peak and pull them out and serve any night of the week.

.

Basic Mashed Parsnips

Peel parsnips, remove the ends, then cut them lengthwise, in half. Lay parsnips on a piece of foil and drizzle olive oil over them. Sprinkle with salt and pepper. Close up the foil into a pouch and then bake in a 400 degree oven for approx. 30 minutes or until fork tender. Put in the food processor, add in 2 tbsp of butter and puree until you get the consistency you like. Serve or freeze in freezer safe container for up to 8 months, some people say 10 months, but i don't recommend past 8 months.

Variations:
Roasted Leek and Garlic Parsnip Puree: 3 large parsnips, 1 leek sliced, 2 garlic cloves peeled-  Roast all the vegtables as above, add in 1/2 cup milk or heavy cream.
Sour Cream and Chive Mashed Parsnip: Cook as directed above, add in 1/2 cup of sour cream, and 1 tbsp chopped chives, add in 3 tbsp butter and puree as above.
Parsnips, Carrot and Apple Mash: 4 parsnips, 4 carrots, 2 apples all peeled and sliced. Steam together until they are fork tender. put in the food processor, add in 1/2 tsp cinnamon, and puree together. (*this also  great for baby food)


Wednesday, November 28, 2012

Spinach and Walnut Pesto Crustini


Thanksgiving is over and now begins the season of cocktail parties, family gatherings and wine and cheese parties. I used to buy the boxes of pre-made appetizers because they are so easy to make, but then I realized what a rip off they really are. I could make such better tasting appetizers for 1/3 of the price. I make a little at a time, store them in the freezer and then pull it out the day of the party and heat. This way I don't have to spend the whole day cooking. 

Crostinis are an awesome appetizers. You can make the topping ahead of time, freeze it and then the morning of, thaw it out, and place on the toast. You can either make Bruschettini or buy it and just put it on a tray and serve. This crostini takes 5 minutes to make, literally. You throw everything in a food processor and then either serve or freeze.

This Pesto is made with baby spinach, but I have made it with frozen spinach in the past and it comes out fine. The key is if you’re going to use frozen spinach is that you defrost it and squeeze out the excess water, otherwise your pesto will come too watery. 
  
Spinach and Walnut Pesto Crostini
2 c packed baby spinach
1/2 c toasted walnuts
1/3 c Asiago cheese
1 clove of garlic
1/4 c olive oil

Put the spinach, walnuts, cheese, and garlic in the food processor. Pulse 3 times, then scrape down the sides, add about half the olive oil. Turn the food processor on and drizzle in the rest of the olive oil until a paste forms. I like mine slightly chunky, not so smooth, but blend until you get the consistency you want. Serve or freeze. Will last in the freezer for 4-6 months.

Monday, November 19, 2012

Freezing Thanksgiving Leftovers

If your family is anything like mine, there is always way more food than anyone could possibly eat in one meal. Remnants of stuffing, sweet potatoes,  turkey, and more remain for days in the refrigerator and ultimately end up getting thrown out. There's only so many things you can do with leftovers right?

Well, freezing your leftovers is a great option to waste less food, and gives you a longer period of time to re-invent them. Not all leftovers will freeze well, but many of them will. The key is to freeze things properly and in proper portion sizes. Since this food has already been served and then frozen, you don't want to have to heat a large amount and end up with leftovers that you have to throw out anyway.

Here is a list of what freezes well and helpful tips on how to store them properly.

Turkey- First thing you need to do is break it down. I don't like to freeze the meat on the bone, so I pull as much meat off the bone and set aside for stock for later. I break it down in a few different ways so that i can use it in a few different preparations  So i'll shred some of it and store in 1 cup portions so i can use it in soups or enchiladas. Then I'll roughly chop some into cubes for chilies, casseroles, and breakfast hash. Finally I'll slice some to serve as a turkey dinner for a quick go to meal any night of the week. Make sure that  you freeze the turkey in an air tight container, and not too much bigger than the amount of meat the you freeze. If i'm using a Ziploc bag i wrap it in aluminum foil and then place in the Ziploc, squeeze the air out and freeze. Basically the more air that circulates around the meat means that it's more likely to get freezer burn and dry out. portioned out the turkey should last in your freezer for 3 months.

Ham- Not your traditional Thanksgiving meal, but I know some families prefer ham to turkey. Ham freezes very well. You basically use the same break down and freezing steps as you would for the turkey. It is good to use later for soups, gumbos, ham croquettes, or even to through in your mac and cheese.  Portion it out and freeze.

Stuffing- Stuffing is tricky. It does freeze well in 90% of cases. However, if you made a dry stuffing it won't last long in the freezer. The stuffing needs to have some moisture to sustain itself in the freezer. The stuffing should also be portioned into single serve portions in an air tight container. You can use Ziplock bags but be sure to squeeze all the air out. Stuffing will last in the freezer for about a month, but not much longer than that so be sure to date it.

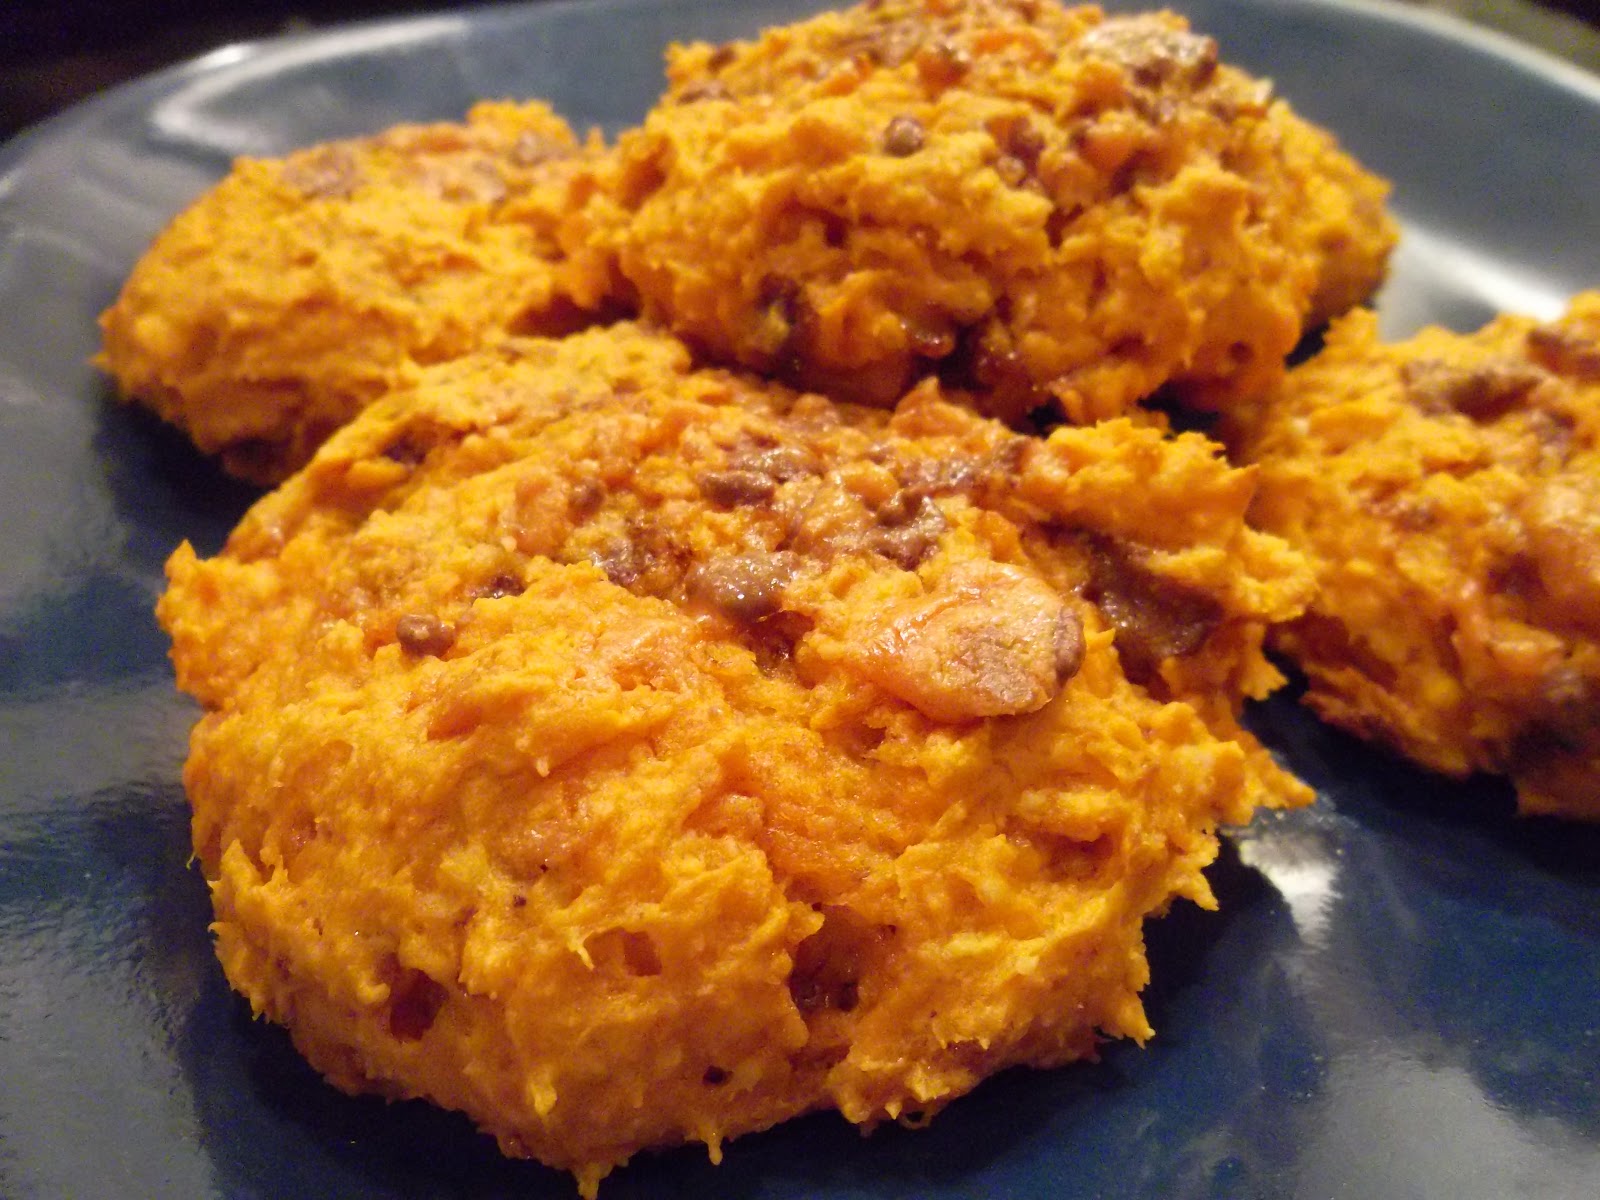
Sweet Potato Casserole- This freezes pretty well. I typically don't serve it again as mashed sweet potatoes again. I'll thaw it and make sweet potato pancakes or use it in a turkey hash. if you do plan on serving as is, it may be a little watery, but still very edible. This can last in an air tight container for 3 months.  Regular mashed potatoes do not freeze well. They become grainy and watery no matter what you do with them.

Cranberry Sauce: Cranberry sauce can be frozen using the ice cube tray method, or you can throw it in a blender make it smooth and freeze so you have a cranberry sorbet. It's awesome. Either way you freeze it will stay good in the freezer for 3 month.

Gravy: Ice cube tray method is definitely the way to go. You can pull out a cube or two when ever your ready to serve. If your gravy it too oily, it may remain somewhat soft when you freeze it. This is ok,  it's still safe. Gravy stays good frozen for 3 months.

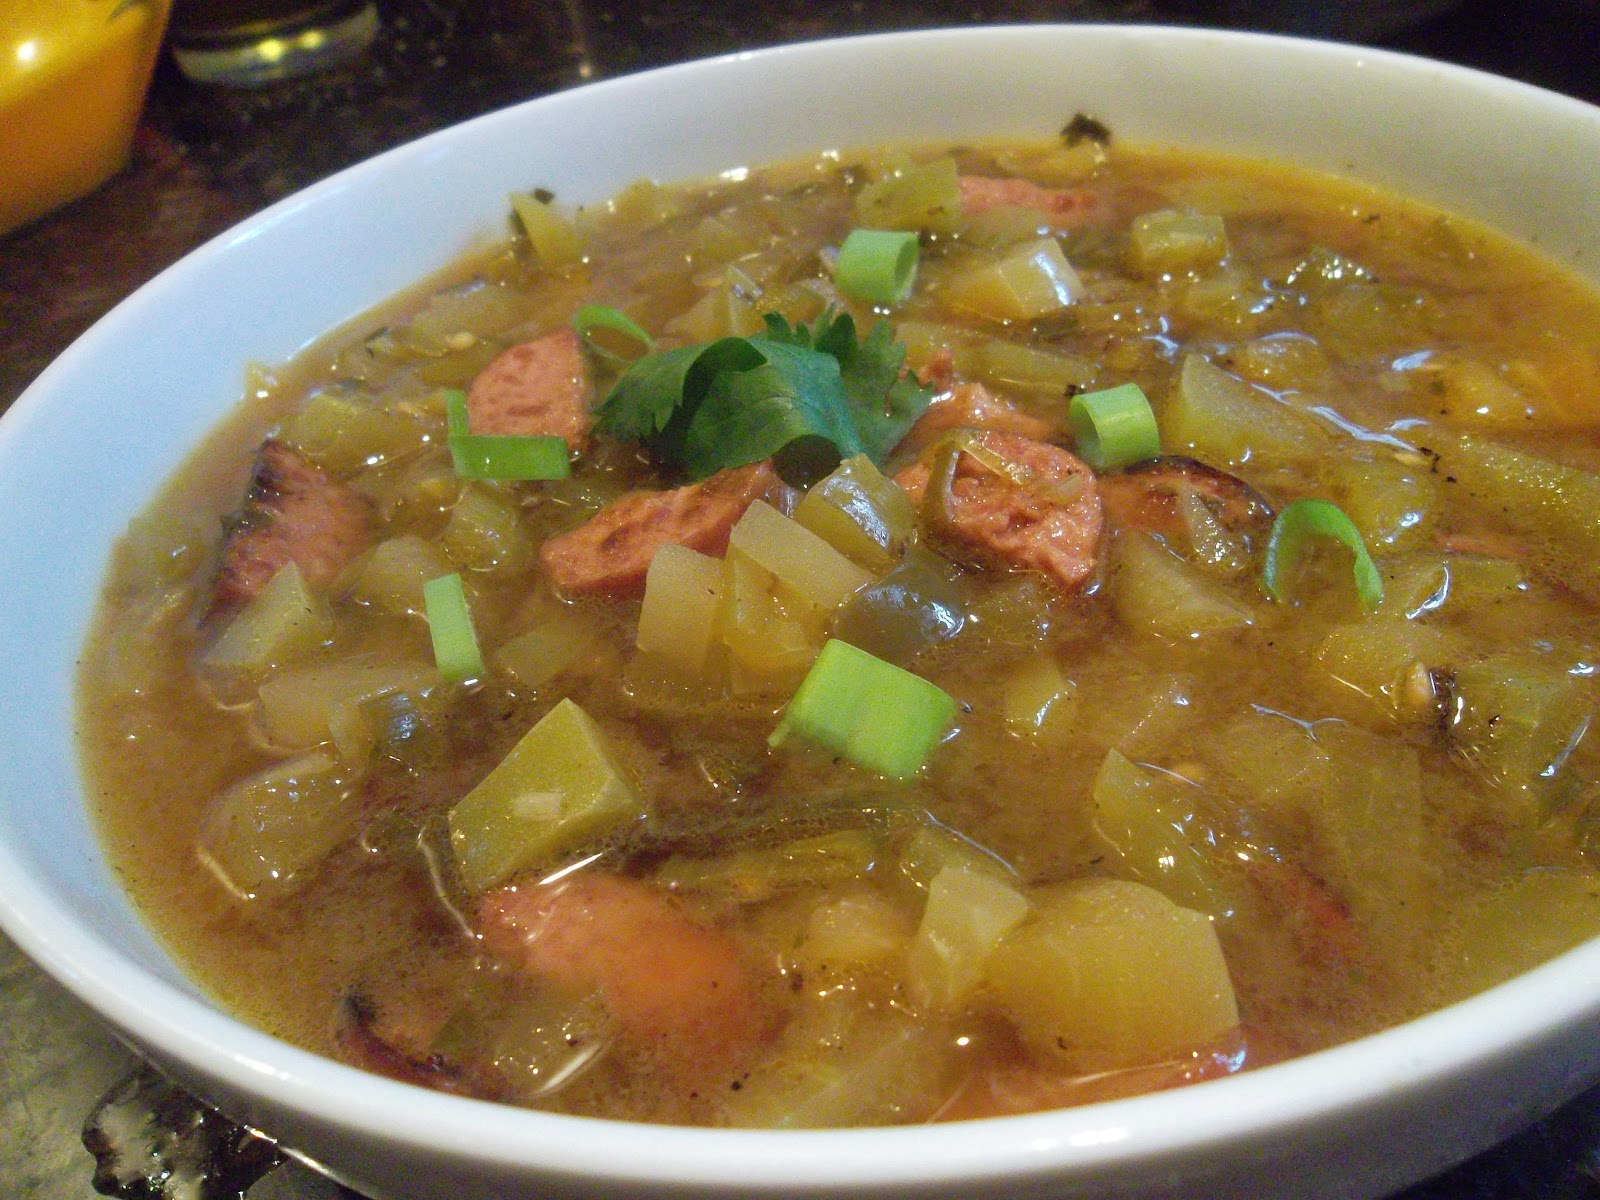
Soup: As long as it is not a cream based soup, like a clam chowder or cream of potato, it should freeze fine. Cream based soups separate and I don't have much luck freezing them. But other soups freeze beautifully. Pumpkin soup, chicken soup, leek soup and so on are perfect candidates for freezing. Turkey stock also freezes well and portion it out so you can grab it quickly for lunch during the week. Most soups last for about 3-4 months.

Vegetables: This depends upon their preparation  I find roasted vegetables do not freeze well at all. Blanched vegetables freeze beautifully. Mashed vegetables freeze pretty well, but they can become a little bit watery. If you're using a Ziploc bag, be sure to squeeze as much air as you can out because thy will get freezer burn. You can also pack them in an airtight container; they won't expand so you don't need to leave that much space at the top. Something like a green bean casserole or honey glazed carrots will freeze well.  They may be a bit softer when you reheat them, but they will taste good.

Pies and Desserts: I often freeze pies, cakes and cookies. the key proper packaging and proper defrosting. You have to slice it into individual pieces, wrap them in aluminum foil, and place in a Ziploc bag. Squeeze out the air and freeze. When you are defrosting. be sure to remove from the bag, and unwrap and place on a cooling rack to defrost. If you don't do this, as it thaws, the water will pool in the aluminum foil and make the dessert soggy. If you do this your desserts can freeze for 3 months. Any cakes with frosting on them do not freeze well, refrigerate them and use with in a week.

Hope this helps to safe you Thanksgiving leftovers. you worked way too hard to prepare a beautiful meal to see it thrown in the garbage. Upcylce your foods by turning them into new dishes.

Sunday, November 18, 2012

Butternut Squash Bisque

Soup is a staple at family gathering and it is so easy to make ahead of time and freeze for when you need it. Now is the perfect time of year for squash of all varieties  Stock up now and enjoy for the entire winter season. This soup can be made with acorn squash or pumpkin instead. Which ever looks the best when you do your shopping. Its so easy and freezes so well. The perfect addition to any thanksgiving feast. You can either freeze this soup ahead of time, or freeze the leftovers and enjoy later.

Typically I say don't freeze anything that has cream in it because it has a tendency to separate when you reheat it. However this is not a cream soup; its a soup that happens to have a little bit of cream in it. I have not had a problem with this soup separating on me. I either heat a small portion in the microwave for myself, or if I'm heating a big batch, heat it slowly in a sauce pan with a 1/4 cup warm chicken stock or water, whisk occasionally and it shouldn't separate on you.

Butternut Squash Bisque
3 tbsp olive oil
1 leek thinly sliced,  white and light green section
2 garlic cloves roughly chopped
1/2 tsp dried thyme
1/4 tsp ground cinnamon
1/2 tsp freshly grated nutmeg
1/4 tsp cayenne pepper optional
1 tsp salt
1 tsp black pepper
1 large butternut squash  peeled, seeded, and cut into 1-inch cubes
4 cups chicken stock
1 cup half-and-half
1 tablespoon fresh lemon juice and zest

Heat oil in a large stock pot over medium heat. Add in the leeks and garlic until onion is softened, 5 to 7 minutes. Stir in the thyme, cinnamon, nutmeg, salt, pepper, and cayenne, cook for 1 minute. Whisk in the chicken stock and half and half. Once combined, add in the squash. Bring to a boil. When its boiling, cover with a lid, reduce to a simmer, and cook until squash is tender, about 20 minutes.Working in batches, puree in a blender until smooth. Stir in lemon juice and zest. Taste and adjust seasoning with salt and pepper. When you are about to serve add a dollop of sour cream and a few chives or toasted pumpkin seeds.

To Freeze: Portion the soup out either into single servings or serve into a batch for your family gathering. Be sure to leave a 1/2 in space because this soup will expand and pop the lid off. 

Saturday, November 17, 2012

3 ingredient Pumpkin Butterfingers Cookies

What is this about? I know they sound crazy, but they are awesome. First off, i'm still trying to get rid of all of this Halloween candy and trying to come up with some creative ways to use it so I stop eating it. Secondly, pastries and desserts in general freeze pretty well . They are a great make ahead for any occasion and especially when your oven is going to be tied up most of the day with a big ol' turkey.

This is the easiest cookie you can make. It is 3 ingredients and there are no eggs in it. There are so many people with allergies now that you have to try and accommodate their needs, with good food that everyone would like. With that being said i made these with butterfingers, but if you have someone that is allergic to nuts, you could totally use Heathbars or whoppers instead. you want something that has a crunch to it. Sometimes when i'm feeling crazy, I'll melt some chocolate in the microwave and half dip them in it for some extra chocolate-iness.

These cookies are so easy to make you'll find any excuse to make them, but they are perfect at the Thanksgiving table and freeze beautifully. Enjoy.

3 Ingredient Pumpkin Butterfingers Cookies

1 box Golden Cake Mix
1 small can pumpkin puree
8-10 fun size Butterfingers chopped up into chunks


Preheat the oven to 350 degrees. Mix together the cake mix, pumpkin puree, and butterfingers chunks until your dough forms. Spoon the dough onto a cookie sheet and place in the oven for 10 minutes, or until the bottoms turn golden brown. Allow to cool.

To freeze:  Place in a freezer safe contain, will last up to 3 months. Defrost on a baking rack before serving.

Thursday, November 15, 2012

Chocolate Chip Cookie Dough Truffles


A friend of mine told me about these vegan cookie dough truffles. I looked up the recipe from Chef Chloe, a vegan blogger and they looked fabulous. But I’m far from vegan so I made these with regular chocolate chips, butter and rice flour. Why rice flour? I found it added a nutty, earthy flavor that I didn’t get with all-purpose flour. Plus this is now a gluten free recipe.

This is perfect dessert for any get together and especially for holiday dinners. There no cooking involved and you can serve them right from the freezer. One of the great things about this recipe is because its egg free, you can eat all the dough you want without feeling guilty.  Be honest how many times have you made a batch of cookie dough and only half of the dough ever made it to the oven. Yeah I know we've all done it. If you've done that then this recipe is perfect for you. 

Here is the link to the original recipe, and below is my version. Once you’ve had one, you won’t be able to stop popping them. http://chefchloe.com/sweets/vegan-cookie-dough-truffles.html

Chocolate Chip Cookie Dough Truffles 
½ c room temp unsalted butter
¾ c packed light brown sugar
¼ tsp. salt
2 tbsp. pure vanilla extract
2 tbsp. water
1 ¼ c rice flour
1 c chopped walnuts (optional)
1/3 c semisweet mini chocolate chips
12 oz. semisweet chocolate 

In your stand mixer, combine the butter, brown sugar, salt, vanilla, and water until combined.  Slowly add flour a 1/3 at a time to prevent it from going everywhere. Mix until incorporated. Remove bowl from the mixer and fold in the mini chocolate chips. Cover dough and refrigerate for 1 hour**.

Get 2 cookie sheets and line them with parchment paper. Take a small spoonful of chilled dough and roll into 1-inch balls with the palms of your hands. Place the balls onto the baking sheets. Freeze for 15 minutes.

Place the remaining 12 oz. chocolate in a microwave safe bowl. Microwave on high for approximately 2 minutes, stirring every 20 seconds.  Let the chocolate cool to room temperature. Remove one tray of cookie dough balls from the freezer. Dip each ball into the melted chocolate and remove using two forks. Place the coated balls back onto the baking sheet and transfer to the refrigerator. Repeat with the second tray of cookie dough balls. Chill until the chocolate is set, about 20 minutes. Either store in refrigerator until serving or gather and place in a freezer safe container. Place in the freezer and keep for a dessert any night of the week.

**A fun alternative for this recipe is put it on a stick like a cake pop. If you do this, place the stick in the ball before refrigerating and then follow the rest of the recipe. You won’t need the forks when dipping in the chocolate because you will have the stick to work with.

Wednesday, November 14, 2012

Homemade Cranberry Sauce in under 15 minutes


It just wouldn't be thanks giving without cranberry sauce, especially to put on my Thanksgiving leftover sandwich. But for some reason, many people still buy the canned stuff. Fresh cranberry sauce is so easy to make its crazy. Best part, you can either make it ahead, freeze it until Thanksgiving, or if you make it fresh and freeze the leftovers. It’s a win-win recipe. Best part it takes only takes 15 minutes to make and 30 minutes to cool. Done and done. It takes longer than that to find it in the grocery store.

One of the nice things about this recipe is that it’s very customize-able to your family’s pallet. In this version I've use honey, orange juice and crystallized ginger. But I have made it in the past with a sweet white wine and apples, which is also delicious.  By using fresh cranberries, the sauce still gets a jelly like consistency because when  the cranberries pop open during cooking, they release pectin, which is a natural way to make jelly or jams. 

Once you try this recipe, you'll never go back.

Homemade Cranberry Sauce
 
2 oranges Juiced and zest
1/2 cup honey
1 cinnamon stick
1/4 tsp. salt
2 or 3 pieces of whole crystallized ginger, chopped into bite sized pieces
1 12 oz. bag fresh cranberries or roughly 4 cups if you pick your own

In a sauce pot, combine the juice and zest from the orange, honey, cinnamon stick, salt and ginger and bring to a simmer over medium heat. Once the mixture is simmering, add in the cranberries and bring it to a boil. Boil for 1 minute, cover with a tight fitting lid and lower heat to a simmer. Stirring the mixture occasionally. You’ll  start to hear the cranberries begin popping. Cook for about 15 minutes or until you think all the berries have popped open. Remove from heat, take out the cinnamon stick, and stir the mixture. Taste; if it is too tart, you can add in some more honey (or sugar) 1 Tbsp. at a time. You can serve this dish warm, at room temp, or refrigerate and serve cold. It’s delicious anyway you serve it.

Freezing - If you’re making ahead of time, you can either keep in the fridge or freeze. If you are going to freeze, place in a freezer safe container, place plastic wrap on the sauce then place the lid on to prevent freezer burn. This mixture will expand so be sure to leave enough head room about 1/2 inch. Or you can freeze using the ice cube method. But be sure to remove from the Ice cube trays when frozen and place in a labeled freezer bag with all the air squeezed out to prevent freezer burn. The cranberry sauce will remain slightly soft even when frozen. This is because of the pectin. It’s normal, you didn't do anything wrong. 

Thawing- You can just take out and thaw on the counter until you are ready to serve, or in the refrigerator if you prefer it cold. If you want to serve it warm, place in a sauce pot, add 1/4 cup orange juice bring to a simmer. Stir together and serve warm. 


Tuesday, November 13, 2012

Sweet Potato Gnocchi with Pecans and Cranberries

Picture from ceramiccanvas.com  

Thanksgiving is almost here and that means lots and lots of delicious food, but that also means lots of time cooking that food. So why not cook as much head of time as you can.  Throughout the week I’ll be posting delicious awesome tasting make ahead food. Spend less time in the kitchen on Thanksgiving Day and more time with your family, because that is really what this holiday is really about. First on the list, Sweet Potato Gnocchi with Pecans and Cranberries.

My sister last year made these awesome sweet potato gnocchi, so I have put my own spin on it. They freeze really well. The sauce is the only thing that you need to make the day of and this is an awesome alternative to your typical sweet potato casserole.  The sweetness from the dried cranberries and the crunch from the toasted pecans, make this dish an unexpected hit.

Sweet Potato Gnocchi with Pecans and Cranberries
2 lbs. red-skinned sweet potatoes
1 12-ounce container fresh ricotta cheese
1 c grated Parmesan cheese
1 tsp. salt
1 tsp. black pepper
1 tsp. freshly ground nutmeg (1/2 if using dried nutmeg)
1 tsp. cinnamon
2 1/2 cups all-purpose flour (you may need it all)

Brown Butter Sage Sauce
1 cup unsalted butter (room temp)
2 tbsp. brown sugar
1 tbsp. cinnamon
6 tablespoons chopped fresh sage plus whole leaves for garnish
Salt and pepper to taste
1/4 c dried cranberries
1/4 c toasted chopped pecans

Preheat the oven to 450 degrees. Wash the sweet potatoes, cut them in half lengthwise and roast in the oven until the sweet potatoes can be pierced easily with a fork. Remove from the oven and cool,

While the sweet potatoes are cooking, get a fine mesh sieve, place it over a bowl, and put the container of ricotta cheese to drain. Once the sweet potatoes have cooled scrape the flesh out and place in a bowl. Add in the drained ricotta, Parmesan cheese, salt, pepper, nutmeg and cinnamon.  Mash together, using a fork, to blend. Mix in the flour 1/2 a cup at a time until a soft dough forms. If your dough is too sticky after you've added the 1 1/2 cups, you can additional flour a 1/4 cup at a time.

Place the dough on your floured work surface. Cut into 6 equal pieces. Take 1 piece and roll out into a long snake about an inch or so in diameter.  Cut into 1 inch piece. Each snake should give you about 20 or so pieces. Repeat with remaining 5 pieces of dough.  When done, gently place the back of the fork on each piece of gnocchi to give the classic indent.  At this point, put them on a baking sheet and place in the freezer. Once completely frozen gather them up and put in a Ziploc bag. Make sure you get all the air out before you freeze.

When ready to use, bring a large pot of water to boil. Graciously salt the water. Working in batches, boil the gnocchi until al dente, approximately 5-6 minutes. Drain, but do not rinse and place on a lined baking sheet loosely cover with foil so they stay warm while you cook the remaining gnocchi.

Melt the butter in a sauté pan over medium heat. Add in the sage and brown sugar. Continue to cook, stirring the butter occasionally until the foam subsides and it begins to brown.  Shut the heat off and whisk in the cinnamon, salt and pepper. Toss in the gnocchi, cranberries, pecans, and serve.

Friday, November 9, 2012

How to get the smell out the fridge and freezer?

After a power outage of more than 2-3 days, you basically have to toss everything that you've been stock piling all season long. The rotting food can leave an odor in the fridge and freezer, which is not only unappetizing, but the smell can seep into new food that you purchase and ice that you make.

How do you get rid of this. First, when you empty out the fridge and freezer, you warm a bleach and soap solution.I use 1 cup of bleach to 1 gallon of water, and 2 hefty squirts of dish soap. Using a scouring sponge I scrub every surface, removing drawers and scrubbing underneath them. Then I use a Q-tip to get the corners and edges, to make sure mold doesn't grow there in the future.  This is good and its disinfected, but now you have a bleachy smell, which is not very appetizing to me.

Traditionally, people use baking soda to remove smells, however I have found that if you leave it in the box it doesn't work very well and you need to replace it frequently to actually get it to absorb strong odors. I prefer to use Activated Carbon/ Charcoal. What is activated charcoal? Wikipedia defines it as a form of carbon processed to be riddled with small, low-volume pores that increase the surface area available for absorption or chemical reactions. Basically, its a very porous form of carbon that is perfect for absorption.  Its used in water filters. People also take carbon tablets for holistic treatments for nausea, gas, poisoning, etc. Its also used in fish tanks to keep the water from smelling.

Where can you get it? I actually go to my local pet store and buy it right in the fish section. its sold in pellets and powder. I prefer the pellets. I use a pie tin and pour a layer of the charcoal in. just enough to cover the bottom and put one in the fridge and one in the freezer. The pet store sells it loose and in mesh bags. I prefer the loos, but you can try either one.

You can buy it other places, online and in natural food stores (ie-whole foods), but I find it so expensive at those places and you are not ingesting it so the activated carbon at the pet store works for me. You can find it for under $10. Activated charcoal works great on a regular basis too, just make sure to put it high enough up that your kids don't try to eat it.

Read more: http://www.answers.com/topic/activated-carbon#ixzz2BjvSAcSv

Thursday, November 8, 2012

Brownie Ice Cream Pizza

 After Hurricane Sandy, I know many of us are just trying to put the pieces back together. Everyone is trying to get back to normal, which is why I waited a little while to post. I hope speedy recovery to everyone who was affected by the storm.

So here is a dish that takes only a few minutes to make and brings smiles to everyone's faces. One of my friends described it as a Disney dessert. I made it after Halloween was cancelled because i cannot be trusted with all that candy. This dish is perfect for kids,parties, pizza, parties, or an excuse to break into your kids trick goodie bags. Get them involved and have them pick out the flavors they want on the pizza.

I was walking in the grocery store and saw a brownie pizza in the freezer section for $20. Seriously. I made two for around $7. This can be made with any combination of candies, any flavor of ice cream, and you can add or subtract any ingredients to suit your families tastes. Since I was making two anyway, I made 2 different kinds. One with all nut candies Snickers, peanut M&M, Twix, and one with out any nut products Junior Mints, Crunch Bars, and plain M&Ms. My cousin has a nut allergy so i try to make a nut free version of things for him, but my husband is a slight nut-ohalic  so i put nuts in for him. make the nut free one completely first. Then make the one with nuts to avoid any cross contamination.


 Brownie Ice Cream Pizza 
1 box brownie mix. (Family Size if you want more crust)
1/2 c oil
1/4 c water
2 eggs
1 tsp vanilla extract
1/2 c chopped walnuts (opitional)
1/2 gallon vanilla ice cream
1/2 c milk
1/2 c rainbow sprinkles
assorted candy ( 3-4 fun size of 3 or 4 different candies)
Chocolate syrup

Preheat your oven to 350 degrees and grease the sides and bottom of 2 cake pans*. Mix together the brownie mix, oil, eggs vanilla, and chopped walnuts. Divide in half between the two cake pans. It is going to be a thin layer of brownie, this is what you want. It will only take 15-20 minutes to cook because it's so thin. Remove from the oven and allow to cool completely.

While this is cooling, in a stand mixer, whisk together the 1/2 gallon of ice cream** with the 1/2 cup of milk. Whisk until it has the consistency of a butter cream frosting. it will be fluffy and form little peaks when you pick it up with a spoon. use a rubber spatula and divide the ice cream among the 2 completely cooled brownies. Spread the ice cream and pour sprinkles on top. Next spread the rest of the candy on top, chopping any bars (snickers, twix, etc.) up into bite size chunks. Drizzle the top with chocolate syrup. Cover the top with plastic wrap and then with aluminum foil. Be sure to freeze completely flat. if you don'e everything will drift to one side and you'll ahve a very lopsided pizza. When your ready to serve, remove from the freezer 5 minutes before so that the brownie has a few minutes to thaw out so you can cut through it.

*i use spring form pans so that its easier to serve when frozen, but if you don't have a spring form pan, cover the bottom and sides of your cake pan with parchment paper.

**take your ice cream out of the freezer 5 minutes before you want to whisk it so that is softens slightly but isn't melting. This will make sure you don't break your stand mixer by trying to whisk hard ice cream.


Sunday, October 28, 2012

Prep for a power outage: Tips on how to save your perishables

So since many areas are looking like they are going to lose power for several days, here is a tip to save the food in your fridge and freezer as long as possible. Fill Ziploc bags with water and place in any empty spots through out your freezer. Use different size bags and squeeze the air out so that you maximum the space in your freezer. Be sure to only fill the bags 3/4 of the way or the bag may split as the water expands during freezing.

Why bother? A full freezer can stay full for 2-3 days, and a half full freezer will only stay for one. by packing your freezer and not opening it, you can save a lot of your food. If you have a freezer drawer, this will also help to keep your refrigerator cooler.  The  following link gives detailed instructions about how to prep yourself, before, during and after you lose power. I used this sight in preparation for Hurricane Irene and was able to save most of my food. http://www.foodsafety.gov/blog/poweroutage.html

Hopefully this will all blow over and not cause the wide spread devastation that is being predicted, but it doesn't look like that is going to happen, so be prepared.

The following is from the National Center for Home Food Preservation


When the power goes out, unplug the freezer and refrigerator, as well as other appliances, to protect them from electricity surges when power returns. Make sure everyone in your household knows not to open the refrigerator or freezer doors; keeping the doors closed will keep the food cold for a longer period of time. Wrap the refrigerator/freezer in blankets, making sure they don’t touch the compressor, to create extra insulation. If it seems that the power will be off for more than 2 to 4 hours, re-pack refrigerated items into coolers with plenty of ice.

Items in the freezer potentially can stay frozen for 2 to 4 days, depending on the size of the freezer, how full it is, and how well insulated it is. A full freezer that had been operating at 0°F will keep foods frozen for about 48 hours if the doors remain closed; a half-full one can only be expected to keep food frozen for a maximum of 24 hours. For extended power outages use blocks of dry ice in the freezer. A fifty pound block of dry ice will keep the contents of a full 18 cubic foot freezer frozen for 2 days. Remember to wear gloves or use tongs when handling dry ice.
When the power does return, check the internal temperatures of all of your perishable foods with a calibrated food thermometer. Discard any perishable food that has been above 40°F for more than 2 hours.

Preparing and planning for severe weather can help you to save the foods that are in your refrigerator and freezer and ensure that they are safe for consumption.

Pumpkin Apple Soup


I love the vegetables of autumn. The squashes and pumpkins are so full of flavor and they are so hearty and delicious on their own, but are also so customizable to various soups, stews, breads and more. Apples are also a weakness of mine, and you cannot beat fresh apples this time of year. So this soup utilizes both fresh apples and pumpkin. It’s the perfect autumn dish, rich and velvety without any cream or dairy so it is the perfect soup to freeze. This soup is a fall staple in my house and I hope it becomes one in yours.

Pumpkins are everywhere right now, and for those of you brave enough to roast your own pumpkin and puree it, now is the perfect time to make this velvety rich soup. But I have made this recipe many times using a large can of pumpkin puree. It is important to be sure that you get pumpkin puree and not pumpkin pie mix. The pie mix has a bunch of spices already blended in it and you don’t want that in the soup. 

I made this soup with vegetable stock, so it’s actually vegan and gluten free, However I have made it with turkey stock at thanksgiving. I’ve made it with beef stock to make it a meaty version of a vegetable soup for the meat and potato man in my house. It’s a flexible soup so you can use any stock you have in your house, just be sure to use low sodium. I also use stock not broth. Broth is a watered down version of stock and I don’t use it very much when cooking. If you prefer broth, by all means use it but you may need to bump up some of spices to enhance the flavor.
 
Pumpkin Apple Soup
2 Tbsp. extra virgin olive oil
1 medium onion chopped
1 large green apple, peeled, cored, and chopped
1 large carrot, peeled, halved and sliced
1/4 c dry red wine
1 29 oz. can pure pumpkin puree
4 cups vegetable stock
1 cup water
1 Tbsp. cumin
2 tsp. salt
2 tsp. lemon pepper
1 tsp. black pepper
1 bay leaf
1 Tbsp. ground ginger
1 Tbsp. fresh grated nutmeg (2 tsp. if using ground nutmeg)
1/2 cup dried cranberries


In a heavy bottomed stock pot, heat the olive oil. Once it’s shimmering add in the onions, once starting to turn golden brown add in the apples and carrots. Cook for 2-3 minutes stirring occasionally Next pour in the wine and scrape up any bits at the bottom of the pot. Cook for a minute and then pour in the pumpkin puree, vegetable stock and water. Whisk to well combine. this will take a minute so be patient  Now come the spices, add in the cumin, salt, lemon pepper, black pepper, bay leaf, ground ginger, and nutmeg.  Reduce heat to a simmer and cook for 25 minutes. Taste to adjust seasoning.  Garnish with dried cranberries.  

To Freeze: Allow to cool completely. Put in a freezer proof container or Ziploc bag. You can either add the garnish before you freeze or after you reheat it. Either way is ok. This soup is thick so it will take a little long to freeze than a broth-ier soup, its ok this is normal.

Wednesday, October 24, 2012

Green Tomato Kielbasi Soup


OK so this sounds weird, and honestly the ingredient list sounds weird too, but it really does make a good soup I promise. I was worried that the kielbasa wouldn't freeze well but it does. Now I use turkey kielbasa because my husband is a teacher and brings these soups for lunch and I don't need him to be gassy in front of his students. You could substitute regular kielbasa or use ham cut into 1 inch chunks.

Like I said last time I got a lot of green tomatoes in my farm share this past week and have been trying to come up with new and interesting things to do with them. I've only ever had them in salsa or fried. But I use it an almost as many ways that I use a regular tomato, the main difference being that you need to add some sort of acid to it because the green tomato doesn't have its own acidity.

You'll see in the picture that I have 2 whole jalapenos cooking in the soup, but when I make it again I’m only going to use one. I think it’s a little bit over kill and my husband agrees. It’s not bad; I just think it was a little too much. But you can play around with it, or leave it out altogether, it's up to you. Also I use one bottle of beer. I use what I have left over in my fridge but I wouldn't use a Coors or Budweiser, something slightly hoppier would be good. But use what you have, don't go buy a whole six pack for this recipe.
 
Green Tomato Kielbasa Soup

2 tablespoons extra-virgin olive oil
1 package turkey kielbasa cut into half-moon shapes
1 bunch sliced scallions, sliced both white and green parts 
2 cloves garlic chopped 
1 12 oz. bottle of beer
2 bay leaves
6-8 green unripe tomatoes, chopped
4 c. low-sodium chicken broth
1 whole jalapeno
1 tsp. salt
1 tsp. black pepper
1/2 tsp. ground mustard
1/2 tsp. dried oregano
1/2 tsp. dried basil
Juice of one lemon

Heat the oils in a large stock pot and brown the kielbasa. This should take about 3-4 minutes. Next add in the scallions and garlic. Cook until they start to caramelizes, about 5-7 minutes, stirring occasionally. Pour in the green tomatoes and cook for 1 minute. Deglaze the pot by pouring the beer in and scraping up all the little brown bits on the bottom. Add in the chicken broth, whole jalapeno salt, black pepper, ground mustard, oregano and basil. Cover and cook for 30 minutes. Add in the juice of one lemon and adjust salt and pepper. Cook for an additional 20 minutes. Serve with a dollop of sour cream or allow to cool completely to freeze. 


To freeze: cool completely then put in freezer safe container and leave 1/2 inch head space to prevent it from popping off during freezing. 

Tuesday, October 23, 2012

M&M Pretzel Kiss bites


So this recipe is a classic but a goodie. I have no idea where this originated, but I got it from a co-worker when I was in college. When she would go home over the long weekends, she would always come back with containers for us. And best part, they are the perfect snack right from the freezer.

As I was thinking about posting this I did a quick Google search and about a million recipes popped up. But the one thing no one tells you is you can mess up this deceptively easy recipe. Seriously, I know but it is possible. If you let the chocolate sit too long in the oven you can burn it. If you don’t refrigerate them to cool almost immediately, they will turn white. Neither of these are good eats. So even though there are only a few steps to this recipe, you have to follow them or else you'll end up with crumbly messes.

This recipe is easily adapted to as many or as few as you want. I’ve made it in the toaster oven with 6 when I buy a bag of the Hershey’s unwrapped kisses, or I’ve made 2 full cookie sheets at a time so I have snacks easily accessible in the freezer at all times. The ratio is 1 kiss to 1 pretzel and 1 M&M. You can use any flavor of kiss or M&M you have on hand. The flavor combinations are endless. You can also use pretty much any snack pretzel you like but I find the twist or waffle shape work the best because the chocolate melts down into the crevasses and ensures a good bite that won’t come apart when cooled.

I’m a little neurotic when I eat M&M so I sort them by color and make an even number of colors. I also decided to make fall festive ones by only using the red, orange, brown and yellow. But I’m strange when it comes to my M&M eating habits. Weird I know, but it’s a fun fact about me.


M&M Pretzel Kiss Bites
24 pretzel twists
24 unwrapped Hershey kisses
24 M&Ms

Preheat the oven to 200 degrees. Place the pretzels on a cookie sheet and place the kiss on top. Put the cookie sheet in the oven for 2 -3 minutes. The kisses will be shiny. Immediately pull from the oven and press the M&M into the kiss. You need to gentle press the M&M in so that the kiss will stick to the pretzel and make one bite. Use a spatula and move the bites onto a plate and place in the fridge for 10 minutes to set. Then I move them to a freezer safe Tupperware and keep in the freezer. I’m not quite sure how long they will last in the freezer because I always eat them with in the month, but I’m sure they can last in the freezer for 4-6 months if you need them to.  

Monday, October 22, 2012

Green Tomato Chili


So my csa is winding down, only 5 more weeks of veggies, so I need to hurry and cook the and freeze them while I can so I can enjoy the spoils of this year’s harvest as long as possible. This week they sent a bunch of green tomatoes. What to do with them? Hmmm. Well for those of you that have never tried them, they are firmer and less acidic than a regular tomato. So I decided to make a chili with them. The firmness of the green tomatoes works perfectly and doesn't break down into mush. I know. Traditional chili doesn't have beans or a bunch of veggies. Pure and simple meat and I promise I will post that eventually, but while I am getting all these vegetables, I need to take advantage. Meat isn't seasonal, so I can post those over the winter months.

This recipe does use a bit of milk, but you’re making milk-corn starch slurry. The milk will not separate when reheating so it’s ok to freeze this recipe. I promise. That ratio of milk to the rest of the liquid is so small that it is ok to freeze with the milk. I know I said never freeze milk, but there are exceptions to every rule and this is one of those exceptions.


Green Tomato Chili

2 Tbsp. vegetable oil
1 large onion diced
2 clove garlic minced
1 lbs. chicken thigh chopped into rough 1 inch pieces
4-6 green tomatoes chopped
2 carrots, peeled and sliced
1 red bell pepper diced
2 Tbsp. chili powder
2 Tbsp. cumin
2 tsp. Hungarian paprika
2 15 oz. cans cannellini beans drained and rinsed
2 bay leaves
1 Tbsp. salt
1 Tbsp. pepper
8 c. (2 boxes) chicken stock
Juice of one lemon
1 cup milk
3 Tbsp. cornstarch


Heat the vegetable oil in a large stock pot. Sweat the onions, once translucent add in the garlic. Cook for 1 minute. Then add in the chicken and brown the chicken. Once the chicken is done add in the green tomatoes, carrots, and red bell peppers. Cook for 1 minute and then add the chili powder, cumin, and paprika and cook for another minute. Next cannellini beans, bay leaves, salt, pepper, chicken stock, and juice of one lemon. Cover and cook for 1 hour. Then in a separate bowl or I use a large measuring cup mix the milk and cornstarch. Once you've whisked together the slurry so there are no lumps slowly add a ladleful of the hot cooking liquid into the slurry while whisking. This is called tempering and it makes sure the milk doesn't curdle when it hits the hot liquid.  Repeat with 2 additional ladleful’s. Once thoroughly whisked, add back into the chili and whisk. Cook for another hour. Serve or allow to cool completely before freezing.


To Freeze- Place in a freezer safe container and leave 1/2 inch head space and place a piece of plastic wrap on the chili before you place the lid on in order to prevent sticking. Lay flat to freeze. 

I reheat in the microwave for 3-5 minutes depending on the size of the container


Thursday, October 18, 2012

Indian Chicken Masala Balls


Chicken Meatballs. Ahhhh. Blasphemy. I know the thought is of a dry flavorless, hockey puck. But really they can be quite tasty. It does take a little bit of work, but the pay off if well worth it. They are a healthy alternative to the beef and are a good way to get the picky eater in the family to eat something a little different, yet familiar. It’s a great way to slowly introduce new flavors into your family’s diet.

Indian food is so flavorful and utilizes fresh spices and herbs as much as possible.  I have used this traditional method to add the flavors because it gives you the most bang for your buck, however, if you can’t find these spices fresh, you can use dried, just rub the spices in the palm of your hand to release the oils. And do not use a coffee grinder that you will actually use to grind your coffee. I have a specific spice coffee grinder that I got at Wal-Mart for 8 bucks, and use it all the time.

These meatballs are great on their own as an appetizer for a party, or good for dinner served with couscous or rice. I've even made tika masala sauce and used these meatballs instead of cut up chicken pieces. They are very versatile, and pack quite a punch in such small package.

Indian Chicken Masala Balls

1 tbsp. vegetable oil
4 tbsp. coriander seeds
2 tbsp. cumin seeds
1 cinnamon stick
3 green cardamom pods
5-6 whole cloves
1/2 c. cashew nuts
2 lb. kg ground chicken
1 small onion chopped
5-8 fresh green chilies
2 tbsp. red chili flakes
5 cloves garlic,
1/4 tsp. dried thyme
3″ piece ginger
1 egg, well beaten
2 tsp. salt
2 tsp. black pepper
1 tbsp. olive oil
1 cup plain bread crumbs

Preheat the oven to 400 degrees. Heat a 1 tbsp. of vegetable oil in a small frying pan. Add the cumin seeds, coriander seeds, cardamom, cloves, cinnamon stick, and cashew nuts. Stir for a minute on low heat until you can spell the spices giving off their aroma. Be careful not to burn the spices it can happen pretty quickly. Cool the toasted spices and place into a coffee grinder. Grind the roasted ingredients. Now in your food processor put in the ginger, garlic, onion, red chili flakes and green chilies; grind into a coarse paste. Next add in the chicken, egg, salt and pepper. Mix together to form a smooth paste.  Gently mix in 1 tbsp. of olive oil by hand, but do not squeeze the paste mixture. This will make the meatballs tough. Now shape the meat into balls the size of golf balls.  Place the meatballs into a bowl with bread crumbs and place them in individual, miniature muffin tin cups. Bake for 20 minutes or until golden and cooked through.

Traditionally the balls are deep fried in oil, which gives them a fantastic crunchy coating on the outside. If you do plan on deep frying them, make sure the oil is piping hot before frying. Place on a cooling rack with paper towels underneath to drain off the excess oils and cool completely. 

You could also skip the bread crumbs all together and grill the chicken meatballs. Just be sure the grill is well oiled and piping hot. Make the balls lemon sized instead of golf ball sized. Place on the grill close the cover and walk away for 5 minutes. I mean it. If you try to remove it or open the grill before this, the chicken will stick to the grill and fall apart. After this turn and cook total about 10-15 minutes, until the chicken is cooked through.

Anyway you cook them, they all freeze well. Simply freeze the meatballs in a single layer in a Ziploc bag. Squeeze out all the air and lay flat to freeze completely.  When reheating either place in the toaster oven, regular oven. Serve on their own with a chutney or place in curry or a creamy tomato sauce.

Wednesday, October 17, 2012

Asian Inspired Sweet and Sour Meatball Freezer Bag


Finally, after blogger was not letting me post and then my poor baby, who was teething so bad he wouldn't take naps for the last two days, I get 15 minutes to post and continue our meatball around the world journey. I came up with this Asian Inspired Sweet and Sour Meatball recipe to make Asian cooking not so far out of reach. You don't need any special equipment or food that you don't have in your pantry or can’t find in your local grocery store.  

This is just a little something different. It is sweet from the pineapple juice and honey, and sour from the vinegar and ketchup. This sauce also works great with chicken tenders, or breasts cut up into chunks. This dish is served great with rice. I prefer brown rice, but really any will do. 

You may notice that scallions have been in practically every recipe the last few days. It’s because the scallion was the crop of the year. Seriously I have received at least 1 bunch of scallions a week since last May. The weather has been so perfect for them that I have had to find as many ways to use them as I can. If you don’t like scallions, or it’s not the season feel free to omit the. 

Asian Inspired Sweet and Sour Meatballs

2 dozen meatballs
1 8 oz. can of pineapple chunks in juice
1 large carrot cut into 1 inch chunks
1 red pepper cut into 1 inch chunks
1 8 oz. can of water chestnuts drained and cut in half
2 stalks scallion thinly sliced
1 cup beef broth
1 cup honey
1/2 cup apple cider vinegar
1/2 cup ketchup
3 Tbsp. soy sauce
1 tsp. ground ginger
1 tsp. Salt 
1 tsp. Pepper
2 Tbsp. corn starch 
1/4 cup cold what

Get a large Ziploc bag and write on it: Pour contents of the bag into the slow cooker and cook on low for 4-6 hours or on high for 2-3 hours. Mix together 2 Tbsp. corn starch and 1/4 cup of water and add into the slow-cooker. Gently mix and cook on low for an additional 30 minutes.  Now in the bag, place the meatballs, the pineapple chunks (reserve the juice), carrot, peppers, water chestnuts and scallion. In a separate bowl whisk together beef broth, honey, apple cider vinegar, ketchup, soy sauce, and juice from the pineapple, salt, pepper and ground ginger. Once well combined, pour over the meat and vegetables Seal the bag, squeezing out all the air before fully sealing. Lay the bag flat to freeze. When ready to use take out the night before and thaw in the refrigerator. Follow the instructions on the bag.

Sunday, October 14, 2012

Meatball Stroganoff Freezer bag


Beef stroganoff is a staple in my mother-in-laws house, so I don't dare mess with it. But it can be difficult to get the texture of the meat, just right. It either ends up too tough, or chewy. So I started making this meat ball stroganoff instead of trying to figure out how to get the meat just right. It’s delicious over buttered egg noodles, or roasted potatoes. 

I know what you’re thinking, dairy doesn't freeze. Here's the secret. You’re not freezing any dairy. You freeze almost all of the ingredients first. When you cook the stroganoff in the slow cooker, you add the dairy for the last 30 minutes. It comes out rich and thick every time. 

Meatball Stroganoff

24 2 inch meatballs
2 lbs. sliced white mushrooms
1 small yellow onion, thinly sliced
2 stalks green onion, thinly sliced
2 Tbsp. soy sauce
2/3 c dry red wine
2 c beef stock
2 Tbsp. tomato paste
2 Tbsp. dry mustard
2 Tbsp. whole grain mustard (stone ground)
2 tsp. brown sugar
1/2 c water
1 c sour cream
4 Tbsp. corn starch
1/4 c cold water

Get a large Ziploc bag and write the following:  Pour all the contents into the slow cooker. Cook on low for 4-6 hours or high for 1-3. In a bowl, whisk the sour cream, cold water and cornstarch together. Whisk 1 cup of hot cooking liquid into the sour cream mixture, then stir the mixture into the slow cooker and cook for 30 minutes on high (just long enough to cook some buttered noodles and grab a glass of wine). Now put the meatballs, mushrooms, onions, and green onion in the Ziploc bag. In a small bowl whisk together the soy sauce, red wine, beef stock, tomato paste, dry mustard, whole grain mustard, brown sugar and water. Once well combined, pour into the Ziploc bag, seal 3/4 of the way and squeeze the air out. Seal and lay flat to freeze. 

When ready to cook, remove from the freezer the night before and thaw in the refrigerator overnight. In the morning pour in the slow cooker and follow the directions on the bag.

Friday, October 12, 2012

Caribbean Meatballs with Rice and Peas


As promised here is the next freezer bag using the meatballs from earlier today. I have a ton of these recipes and will continue to post variations through out the weekend. There is just something about a good meatball that makes me think comfort. But meatballs are so much more than just spaghetti and red sauce, although that is good. Every culture has their version of meatballs. 

Here is my version of Caribbean meatballs. Is sweet and spicy and goes perfectly with rice and peas. I’m posting the recipe for rice and peas underneath, however do not freeze the rice. Rice, in general  does not freeze well. Rice tends to become freezer burned and if you do try to reheat it, It will be mushy. You could also serve this meal with any rice.

Caribbean Meatball Slow Cooker Bag

12 Meatballs http://frozendinnerdiva.blogspot.com/2012/10/meatballs.html
3 Tbsp. Jerk Sauce
1 c. beef broth
1/4 c. coconut rum
1 Tbsp. honey
1/2 tsp. dried thyme
1 tsp. Worcestershire Sauce
1 8 oz can pineapple chunks in juice
1 stalk of scallion chopped (green and white)

Get a large Ziploc bag and write the following on it. Pour the contents into the slow-cooker and heat on low for 4-6 hours or on high for 1-3 hours. Combine the jerk sauce, beef broth, rum, honey, thyme and juice from pineapples. Whisk together. Put the meatballs, pineapple chunks, scallions and sauce in the bag. Zip the bag 3/4 of the way and squeeze the air out. Seal the rest of the way and then squish around to make sure the meat balls get completely coated with the sauce. Lay flat to freeze. When ready to use, remove from the freezer the night before and thaw in the refrigerator overnight. Place in the slow-cooker for 4-6 hours on low.


Rice and Peas

1 Tbsp. oil
1 small onion, chopped
1 clove garlic, chopped
2 c. of long grained white rice
1 13 oz. can coconut milk + enough water to make 4 cups of liquid
1 15 oz. can red kidney beans drained and rinsed
1/4 tsp. dried thyme
1 tsp. salt
1/2 tsp. pepper
1 scotch bonnet pepper (whole, stem and all do not chop up)

Heat the oil in a large sauce pot. Add the onion and garlic and sautée until golden brown. Add in the rice and toast for 1 minute. Pour the liquids, beans, thyme, salt and pepper; bring to a boil. Add rice and stir for a minute. Reduce heat to Medium-Low. Place whole scotch bonnet pepper on top of liquid and cover tightly for 30 minutes or until rice is cooked. Remove scotch bonnet pepper before serving. Do not attempt to freeze

Meatballs in Roasted Marinara Sauce


Meatballs are such a versatile food that there are so many different sauces one can use to serve them. Obviously this is more of a traditional Italian version of meatballs and gravy. It’s quick and easy for that familiar family dinner. Perfect for Sunday dinner with the family.

So here is the first of the various meatball slow-cooker bags. Each of the components to this recipe bags are already posted on the blog already, but the links are here for easier access.

Meatballs in Roasted Marinara Sauce Slow Cooker Bag


Get a large Ziploc bag and write the following on it. Pour the contents into the slow-cooker and heat on low for 4-6 hours or on high for 1-3 hours. Put the meatballs and sauce in the bag. Zip the bag 3/4 of the way and squeeze the air out. Seal the rest of the way and then squish around to make sure the meat balls get completely coated with the sauce. Lay flat to freeze. When ready to use, remove from the freezer the night before and thaw in the refrigerator overnight. Place in the slow-cooker for 4-6 hours on low.

Serve over spaghetti or perfect for meatball parmesan.

Meatballs


I thought this posted last night, but apparently i forgot to hit the post button. Sorry about that. To make up for it, throughout the day I will be posting various slow cooker bag recipes to freeze with these meatball. Some of the sauces for these bags have been posted on the blog already, but i will also be including two new ones. so check back periodically throughout the day for the additional recipes.

Everyone has their own meatball recipe; one that has been passed down from grandma, who got it from her grandmother. This is not that recipe. This is a combination of Alton Brown's, Joy of Cooking, and some inspiration of my own. I don't fry my meat balls. Shock I know, but I bake them in muffin tins (the Alton Brown method). This makes them less greasy, and I find makes them better when you freeze them.

I make 2-3 batches of these at a time and then portion them out into various slow cooker bags with different sauces, so they are ready to go when I am. Since they are cooked through, the slow cooker mainly heats the sauce and infused the meatballs with the flavors.

This looks like a lot of ingredients, especially compared to how simple my recipes normally are. However, I find most meatballs rather plain. I like my meatballs full of flavor on their own so I can eat them on their own if I so choose, or use them as a vessel to soak up some amazing sauces. Most of these ingredients are things that you have in your pantry anyway. Give them a shot. They may not be your grandmother’s recipe, but I enjoy them.

Meatballs
1 lb. ground beef
2 garlic cloves, minced
1 medium onion, finely chopped
1/2 c. chopped fresh parsley (1/4 c. if dried)
1/2 chopped fresh basil (1/4 c. if dried)
1/2 c. grated parmesan cheese
1/2 c. fresh breadcrumb + 1/4 c. to coat
1 large egg, beaten
2 Tbsp. Worcestershire Sauce
1 Tbsp. Lemon Juice
2 Tbsp. tomato paste
1 tsp. garlic powder
1 tsp. onion powder
1 tsp. cumin
1 tsp. fresh grated nutmeg (1/2 tsp. if dried)
1 tsp. paprika (I use Hungarian Hot paprika, but use what you have)
1 tsp. salt
1 tsp. ground black pepper
1 tsp. red pepper flakes (optional)

Preheat your oven to 400 degrees.

In a large bowl, combine all the ingredients, except the 1/4 cup of bread crumbs. Mix together using your hands. It’s a messy job, but there’s really no other way to do it. Be sure not to over work the meat or they will become dry and tough.

Place the remaining 1/4 cup of bread crumbs into a small bowl. Using a large Tbsp., portion the mixture into approximately 2 inch balls. Use your hands to shape the meatballs into balls, gentle squeezing as you form them. Roll the meatballs in the bread crumbs and place them in individual, miniature muffin tin cups. Bake for 20 minutes or until golden and cooked through.

Allow to cool, completely. then place in a freezer proof container. To reheat, place in over (I use my toaster oven) at 400 degrees for 10-15 minutes, until crisp. Serve. Or use in one of the slow-cooker meatball freezer bag recipes. and follow instructions. Enjoy